
Laundry Makeover - Before and After Transformation
- francone8
- Mar 13
- 9 min read
Updated: Mar 15

When the cat is away...

My husband announced that it was time for his annual Vogel State Park camping trip.
Immediately I decided I'd surprise him by making over the laundry area while he was away. Yep, you're right, probably a charming laundry area wasn't his dream, but NOT having to work to make that dream of MINE happen, was a surprise he'd love!

Planning was Key!
First I envisioned what I wanted the space to look like. I knew I wanted more shelves where I could use baskets for storage. I knew I wanted color and pattern. Wallpapering that area with its cramped areas and angled walls would've been expensive and hard to do, so I decided to stencil. Royal Design Stencils to the rescue! I chose a pattern I liked and ordered making sure it would get to me in time. I also knew I wanted the floor to look more updated. It is a ceramic tile floor and was in good shape, but looked like it was from 2007 and it was. Painting it wasn't an option because it takes many days to cure and who wants to live without their washer and dryer that long?! Thus peel and stick it was. I plugged my ideas in Chat GPT to ponder the color options. If you've worked with creating images on AI, you know it is a challenge to get it to do just what you're wanting. Cool and awesome that it can take your words and images and transform, but rando things do happen.

Here are the images that helped me decide I didn't want EITHER of these choices.

Sooo a little deception was necessary...
I've been the assistant MANY times on projects over the years, but my plan for for hubby to not have to do ANY of the work meant I'd have to learn how to handle some tools. Clearly I'd need lessons on how to
cut the chair rail with the miter saw,

attach the nail gun to the compressor


nail the chair rail to the wall,

and how to find a stud.
In order to have a reason to get him to teach me all of this, I told him I was going to help my friend of a looooong time, redo her bathroom! Luckily she was onboard with me using her in this little lie, but she did caution me to watch out for lightning! Being that hubby is kind and trusting, he didn't suspect a thing!
Let the "reno" begin!
His truck was barely out of the driveway when I proceeded to watch helpful videos on disconnecting the washer and dryer. I promise there is a "how to" video on most ANYTHING you want to try and do! Anyway, got the dryer vent hose disconnected and moved the dryer. The washer proved a bit more challenging! The water supply hoses were NOT budging! Lo and behold there are videos on how to deal with that. THANK goodness and also thankfully the Mr. has most any tool known to man including the channel lock pliers.
Let the buying BEGIN!

From Home Depot:
Chair Rail
Board to make shelf
Small board for small shelf only I looked in ALL the wrong places
Decorative wooden brackets to hang shelf
Gorilla construction glue
Small foam roller to paint the cabinets
From Sherwin Williams:
Duration Satin finish paint in Color:
I debated over SW Stardew, but ended up choosing SW Morning at Sea 9634
and I love it!
By the end of day one, I was TIRED, but feeling oh-so-good about my progress!!

Day 2, I'm feeling optimistic! I've removed everything from the cabinets and shelf. I marked where the chair rail should go. With the height of the ceiling I chose for the top of the chair rail to be 35.5" from the floor (about 1/3 of the total height). I decided it would be easier to cut the chair rail then paint it BEFORE mounting.

That did end up being the best way to do it. I painted the cabinets on the outside and left the insides the neutral color they already were. I painted the shelf, and all the shelf boards and brackets, then on to the baseboard and the lower part of the wall to the marks I'd made for where the top of the chair rail would go.


My handy hint for painting the shoe mold is to use a sturdy paper (I cut a file folder) and put moving tape folded over on one edge. It allows you to just zip across without getting paint on the floor. ** A quality tip would be to remove the shoe mold if you're replacing the floor, and then reattaching once the new floor is down, but I figured in the laundry closet I was going for expediency rather than perfection.
Minor glitch, the peel and stick tiles were delayed a day in arriving, but luckily I felt like I'd still have time to get them down.
Day 3, STENCIL day! I had purchased my paints from Michael's, and ended up deciding I wanted to get different stenciling brushes so I went to Hobby Lobby. I bought a mini-roller and a large brush they called I think a wax brush. So an hour an a half of work time was spent going to get the proper brushes/miniroller, but they were must-haves.
The stencil I chose from Royal Design Studio was called "Folk Flower Allover Wall Stencil". I used Stencil Ease spray adhesive which didn't exist back in the day. It really helped get crisp lines.


Stenciling Tips:
Buy enough paint for your entire project.
Make sure to have rollers or large stenciling brushes if you're working on a wall stencil with large things like the blue flowers in the stencil I used.
The stencil spray adhesive is great to have.
I learned that if you paint the parts closest to the area you'll stencil next, it has a few extra seconds to dry before you're lining up to do your next area and that's a good thing!
Free hand details to add to the layered look and complexity of design. I brushed on the white radiating out from the center of the flower, and it really added to the depth of the design.
Don't sweat the small stuff! There are PLENTY of errors in mine, but the overall effect is good.
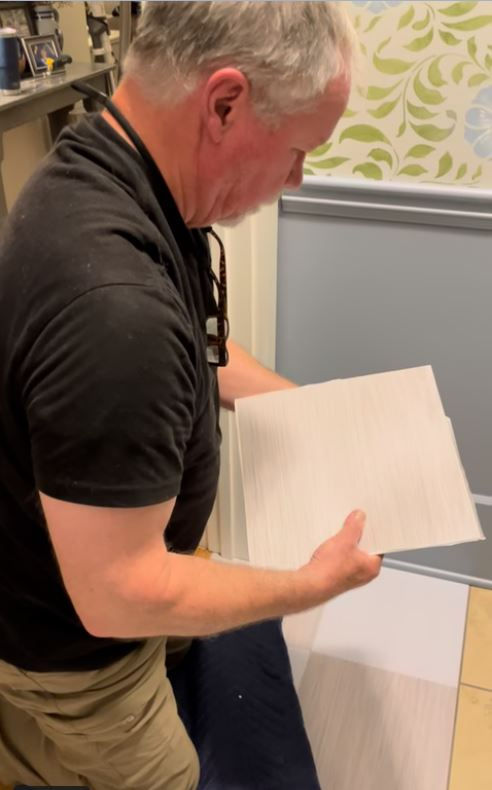
Day 4 was finish up the stenciling and start hanging the chair rail. The floor had arrived so I laid it out without pulling off the backing.
Uhoh! I do NOT like it the floor with the rest of the room.

Luckily they were from Amazon and were returnable. I ordered a tan/white combo from FloorPops that turned out to be on sale for HALF price AND would arrive the next day.
TROUBLE in River City!
Uhoh! I could not, for the life of me find the studs! I tried and tried and I just didn't trust myself. I was SOOOO disappointed, because I had envisioned my camping boy arriving home and being oh-so-blissfully surprised with a fully renovated laundry closet and him having NOTHING to do to help me. I just couldn't risk messing up the walls. I also couldn't figure out how to put the shelves together by myself, much less hang them, so I got out my white flag of surrender.
My sweet and supportive hubby was SO impressed with the whole scheme and what I DID get done and jumped right in to help (OK, really I was mostly the helper) on all that was left to get done.


Even skilled boy had a time finding the studs. Partially because the stud finder is ancient and partially because they were in odd places. I used the glue before nail gunning the chair rail in place. I wore my favorite shirt in celebration of tackling the hard stuff!

We got the long shelf hung. By "we" I mean he, with just a tiny bit of assistance from me. And the little shelf hung. Again, there's no way I could've done that without him! He hung the broom organizer thingy, which was oddly a beast to do. Thank goodness he was such a willing and able handy man!

It was finally time to tackle the floor! Like I said, it would've been a more profesh job to remove the shoe mold and put it back down once the floor was installed, but for a closet - Nahhh!!
Lots of hands and knees time, but really other than that, a pretty easy process. (So says me who was yet again, just the assistant.

Once the floor was laid, we replaced the washer and dryer, and I finished organizing and zhushing!
We couldn't love it more!

Stenciling Supplies


Takeaways from this Laundry Makeover:
Laundry rooms aren’t always the most glamorous spaces in our homes. In fact, many laundry areas start out feeling more like a utility zone than a place you enjoy being in.
That was definitely the case with my laundry closet.
The space worked, technically — but it felt cluttered, unfinished, and not very inviting. I knew that with a few thoughtful design choices, I could transform it into something both functional and beautiful.
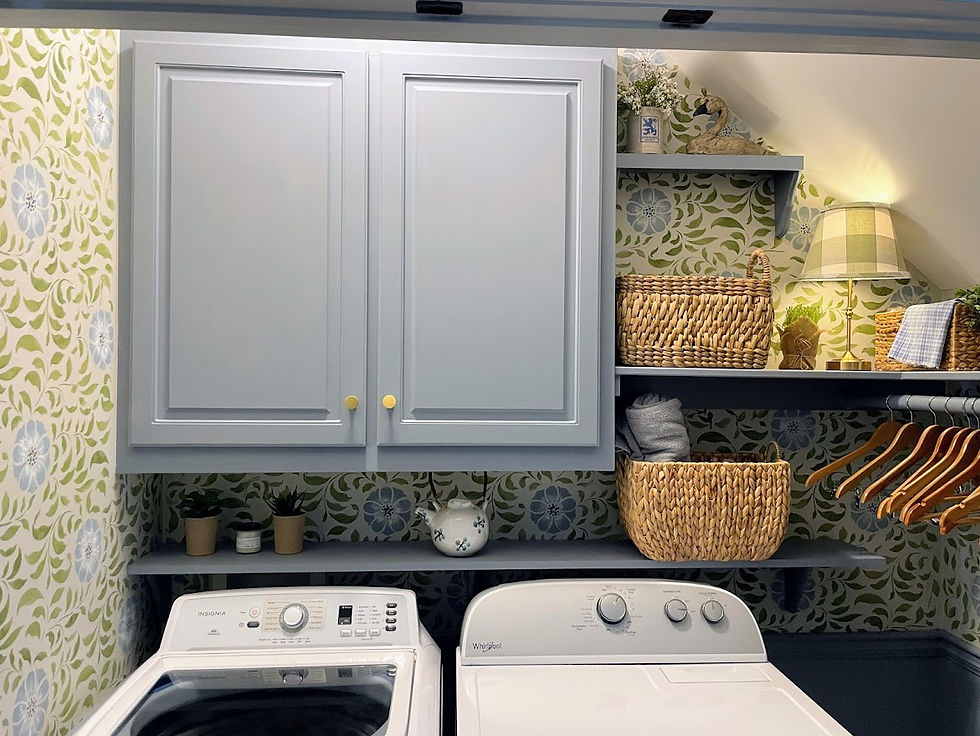
Here’s how the transformation turned out.
Before the makeover, the laundry closet had the basics — washer, dryer, cabinets, and shelving — but it lacked organization and personality.
Needed items like laundry baskets, hanging clothes, and cleaning supplies didn’t have a cohesive home, which made the space feel more chaotic than it needed to be.
The room did its job, but it certainly didn’t make my “eyes happy.”

The Vision for the Space
My goal was simple:
✔ Make the space more organized
✔ Add warmth and charm
✔ Keep it practical for daily use
Even a small laundry closet can feel special when you add a few intentional design touches.
What I Changed
1. Stenciled for Instant Personality
One of the biggest changes was adding pattern by way of stenciling. Even though this is a small space, the stenciling creates visual interest and makes the room feel more thoughtfully designed.
Because laundry rooms are often small, they’re a great place to have a little fun with pattern.
2. Styled the Open Shelving
Instead of leaving shelves purely functional, I added woven baskets and a few decorative elements.
Baskets are one of my GO-TO design elements! They are wonderful in laundry rooms because they
• hide clutter
• keep supplies organized
• add texture and warmth
3. Added Lighting for Warmth
A small table lamp on the shelf instantly softened the space. Laundry rooms are often lit with bright overhead lighting, but a lamp adds a cozy glow that makes the room feel more welcoming.
I didn't have a plug accessible, so I just used a rechargeable lamp. The shade I had covered for another space, but ended up loving in the laundry room more.
4. Coordinated Colors and Materials
Keeping the color palette cohesive helped the room feel calm instead of chaotic.
Natural textures like baskets, greenery, and wood hangers help balance the patterned walls and painted cabinets, and lower wall area.
After: A Laundry Closet That Feels Finished
The transformation turned a purely functional closet into a space that feels intentional, charming, and organized.
Now when I open the doors to the laundry closet, it feels calm and welcoming. It truly puts a smile on my face AND Mr. A Certain Charm's!

Even everyday spaces like laundry rooms deserve thoughtful design.
Why Small Spaces Are Worth Decorating
Some people think design should only happen in large rooms like living rooms or kitchens. But I’ve found that small spaces often make the biggest impact.
When a space you use every day feels beautiful and organized, it can genuinely make daily routines more enjoyable.
Want Help Making Your Home Feel More Finished?
If you’ve ever looked around your home and thought:
“I don't really know how to make this space feel homey and beautiful”
You’re not alone.
Through my Refresh or Restyle design services, I help homeowners, here in the Monroe, Hoschton, Athens area, and even Lake Sinclair and Lake Oconee, pull their spaces together using what they already have — along with a few carefully chosen additions.
My goal is always to create rooms that make your eyes happy while staying mindful of your budget.

As an interior decorator in Monroe, Hoschton, Athens, Lake Sinclair and Lake Oconee Georgia, I love showing clients how even small spaces like a laundry room can become beautiful and functional.


Comments